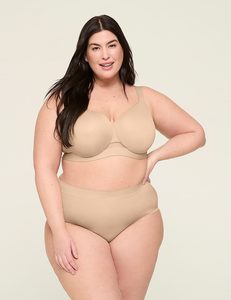

How to Care for Bras So They Last Longer
Disclosure: Some of the links in this post are affiliate links. This means if you click on the link and purchase an item, I will receive an affiliate commission at no extra cost to you.
Let’s be honest: finding a bra that actually fits, supports you, and does not make you want to take it off the second you walk through the door is a rare and lucky moment.
You probably know the feeling of trying on dozens of styles until you finally find the one. It is soft, it holds everything in place, and it makes your clothes look great.
But what happens when that perfect bra suddenly starts to fall apart? After a few short months, you start to notice the frustrating signs:
- The stretchy back band gets so loose that you have to use the tightest hooks just to keep it on.
- The smooth foam cups get bumpy, folded, and crushed out of shape.
- Or the absolute worst part, a sneaky metal wire pokes right through the fabric to stab you in the ribs all day.
It is sad, it is annoying, and honestly, having to buy new bras all the time costs way too much money.
Here is the good news: your everyday favorites should not break down after just a few months. The secret to keeping them perfectly shaped and supportive is not about buying more expensive underwear.
It is all about how you wash, dry, and store them after you take them off. Simple, everyday laundry mistakes are usually what ruins them.
If you are tired of throwing away your most comfortable bras way too soon, you are in the right place. We are breaking down the ultimate, step-by-step guide to bra care to help your favorites last a very long time.
How to Wash Your Bras Without Ruining Them
Perfect. Let’s start with the part that probably has the biggest impact on how long your bras actually last: washing them.
Bras deal with sweat, body oils, deodorant, and everyday dirt, so you obviously need to wash them. The problem is that they also contain elastic, delicate fabrics, molded cups, hooks, and sometimes underwire, all things that do not respond well to rough treatment.
The biggest mistake is treating your bra like an ordinary T-shirt.
Throwing it into a hot wash, scrubbing it aggressively, twisting it dry, or letting it get tangled around heavier clothes can slowly stretch the elastic and distort the shape. You may not notice the damage after one wash, but repeated abuse adds up.
If you want your bras to stay supportive, comfortable, and smooth, these are the washing methods worth knowing.
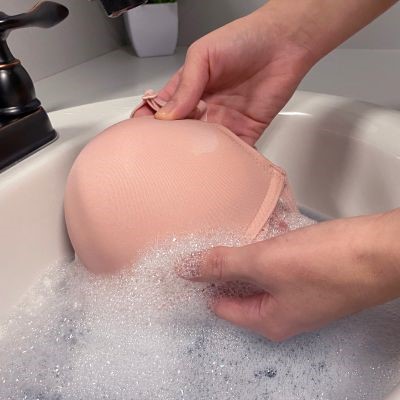
The Gold Standard: How to Hand-Wash Your Bras
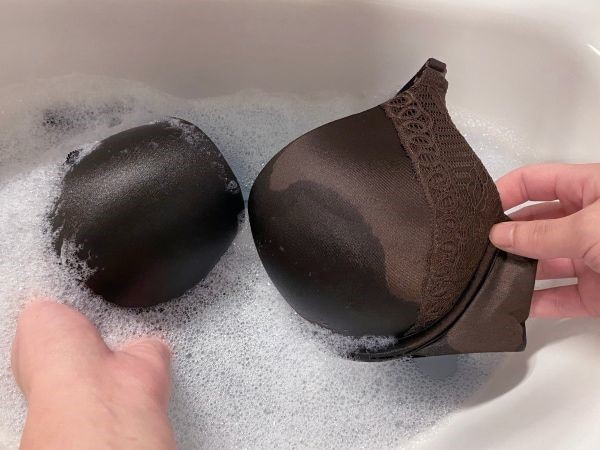
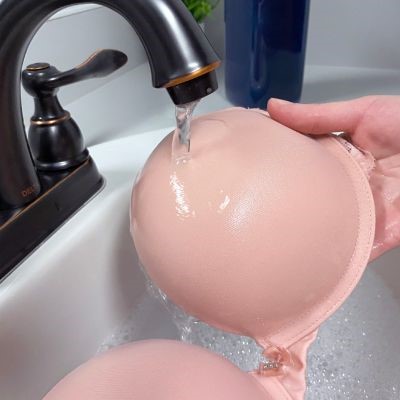
If you want to give your bras the gentlest possible treatment, hand-washing is your best option. It gives you much more control over the water temperature, movement, and pressure, which means less unnecessary stress on the fabric and elastic.
And before you assume hand-washing means standing over the sink for half an hour, relax. Most of the process involves simply letting the water and detergent do the work.
1. Fill the Sink With Cool or Lukewarm Water
Start with a clean sink, basin, or large bowl. Fill it with cool or lukewarm water—never hot water.
Why does the temperature matter?
Bras rely heavily on elastic to create a snug, supportive fit. Too much heat can weaken elastic fibers over time, making the band lose its stretch and recovery.
That means your once-snug bra may start riding up your back or feeling loose much sooner than expected.
Add a small amount of gentle detergent designed for delicate clothing. You do not need to create a mountain of bubbles. Too much detergent can actually make rinsing more difficult and leave residue behind.
If you regularly wear bras underneath your favorite Stylish Plus Size Work Outfits, keeping them clean without damaging their shape is especially important because a well-fitting bra can affect how your entire outfit sits.
2. Let Your Bras Soak for 10 to 15 Minutes
Place the bras into the water and gently press them down until the fabric is completely wet.
Give them a gentle swish with your hands, paying particular attention to areas that collect sweat and body oils, such as the underband and the area around the cups.
Then leave them alone for about 10 to 15 minutes.
This is where you can let the water and detergent do most of the work. You do not need to scrub the fabric aggressively to get it clean.
In fact, excessive rubbing can create unnecessary friction, especially on lace, mesh, and other delicate materials.
Think of it as loosening the dirt rather than attacking it.
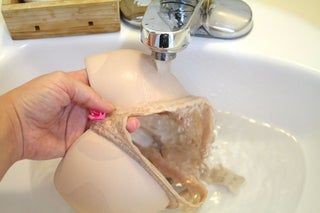
3. Rinse Until the Water Runs Clear
Once the bras have soaked, drain the dirty water and refill the sink with clean, cool water.
Gently move the bras through the water to release the detergent. Drain and refill the sink again if necessary.
Keep rinsing until you no longer see soapiness in the water.
This step matters more than you might think. Leaving detergent trapped inside the fabric can cause residue to build up against your skin and may affect delicate fibers over time.
Do not be tempted to speed things up by holding the bra under a powerful stream of water and aggressively rubbing it. A gentle rinse is enough.
4. Press the Water Out—Never Wring It
This is one of the easiest ways to accidentally damage a bra.
When you finish rinsing, resist the urge to twist the cups or wring the bra out like a wet T-shirt. That twisting motion can put unnecessary stress on the cups, seams, elastic, and underwire.
Instead, gently press the bra between your hands to release some of the water.
For an even gentler method, lay the bra flat on a clean, dry towel. Roll the towel over the bra and gently press down. The towel will absorb much of the excess moisture without forcing the bra out of shape.
It takes a little longer, but your bra will thank you for it.
The Realistic Way: Safely Washing Bras in a Machine
Now, let’s be realistic.
Hand-washing may be the gold standard, but nobody has unlimited time. There will be days when you have a pile of laundry waiting, a busy schedule, and absolutely no desire to stand at the sink washing underwear one piece at a time.
That does not mean you have to stop wearing your favorite bras or accept that the washing machine will destroy them.
You can machine-wash your bras. You just need to make the process gentler.
1. Hook the Clasps Before Washing
Before your bras go into the machine, fasten the back hooks.
Leaving them open creates an easy opportunity for the metal hooks to catch onto other garments, delicate lace, or even the bra itself. As the machine spins, that constant pulling can stretch the fabric or damage the bra.
Hooking the clasps also keeps the bra from becoming tangled as easily during the cycle.
It is a tiny step, but it takes only a few seconds.
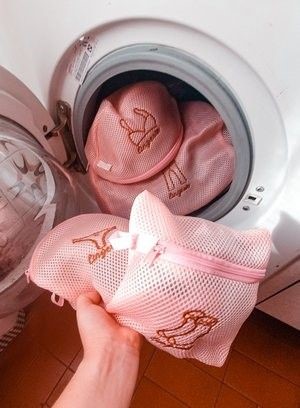
2. Put Them Inside a Mesh Lingerie Bag
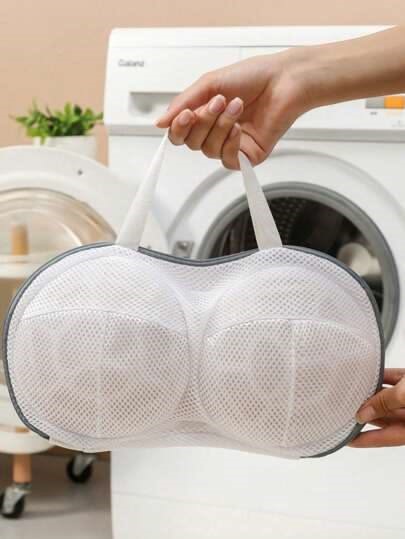
Once the clasps are secured, place your bras inside a zippered mesh lingerie bag.
Do not stuff the bag until it is packed tight. Give the bras enough room to move around without getting tangled.
The purpose of the bag is not to magically make machine washing harmless. Instead, it creates a layer of protection between your bras and the rest of the laundry.
Think about what happens inside a washing machine: clothes twist, tumble, rub against one another, and get pulled around by the movement of the drum. Your bra can easily get wrapped around jeans, trapped underneath heavier clothing, or stretched while everything spins.
A mesh bag helps reduce that rough contact.
3. Choose Cold Water and the Delicate Cycle
Set your machine to the delicate, gentle, or hand-wash cycle and choose cold water.
Avoid hot cycles whenever possible. Remember, heat and elastic are not exactly best friends.
A gentle cycle also reduces the aggressive movement that can stretch straps, distort cups, and put unnecessary stress on seams and underwire.
Use a mild detergent and skip the fabric softener. Fabric softener can leave a coating on certain fabrics and elastic materials, which is not something your bras need.
4. Keep Bras Away From Heavy Laundry
This is another mistake that is easy to overlook.
Even if you use cold water and a delicate cycle, throwing your bras into a load full of heavy jeans, towels, sweatshirts, and thick clothing can still expose them to unnecessary friction and weight.
Whenever possible, wash bras with other lightweight or delicate items.
If you are already building a wardrobe around comfortable, well-fitting pieces from The Ultimate Plus Size Outfit Guide for Every Body Shape, taking care of the foundation underneath those outfits makes just as much sense. Your bra is doing important work before your clothes even go on.
5. Never Toss Your Bras Into the Dryer
Here is where many perfectly good bras meet their unfortunate end.
The dryer combines heat, tumbling, and repeated movement—the exact combination that can be hard on elastic and delicate bra fabrics.
Instead, take your bras out of the washing machine as soon as the cycle finishes and reshape them while they are still damp.
Lay them flat on a clean, dry towel or hang them in a way that does not stretch the straps or band.
And whatever you do, do not hang a wet bra by one strap. The extra weight of the water can pull on the elastic and gradually stretch it.
Let it air-dry naturally, away from excessive heat.
One More Thing: Do Not Wash Every Bra the Same Way
Not every bra in your drawer needs exactly the same treatment.
A delicate lace bralette, a structured underwire bra, a molded-cup T-shirt bra, and a sports bra can all have different fabrics and construction. Always check the care label first, especially if the manufacturer gives specific washing instructions.
And if you have invested in bras that work particularly well underneath your 35 Beautiful Plus Size Dresses for Every Occasion, it is worth giving them a little extra care.
Molded cups, smooth fabrics, and structured designs can lose their shape when you repeatedly expose them to rough washing and drying.
The basic rule is simple: the more structured or delicate the bra, the more carefully you should treat it.
After all, you already put effort into finding clothes that make you feel polished and comfortable. Your undergarments deserve the same attention.
How to Dry Your Bras Without Stretching or Damaging Them
Washing is only half the battle. What you do after the wash can make just as much difference to the life of your bra.
You can carefully hand-wash a bra in cold water, use gentle detergent, and rinse it perfectly—but then ruin all that careful work by throwing it into a hot dryer.
Heat, hanging the wrong way, and leaving a bra twisted while it dries can gradually weaken the elastic, distort the cups, and change the way the bra fits.
So once your bras come out of the water, handle them gently.
The Number One Rule of Drying: Keep Them Away From Heat
If you remember only one thing from this section, remember this: keep your bras out of the dryer.
Bras contain elastic, delicate fabrics, and sometimes molded foam cups. High heat can weaken those materials over time, while the tumbling motion can stretch straps, distort cups, and put unnecessary stress on seams.
That does not mean one accidental trip through the dryer will instantly destroy your bra. But repeatedly drying bras with high heat can shorten their useful life considerably.
If you have already invested in bras that fit properly and work well underneath your plus size dresses, you want to protect that fit for as long as possible.
Here is what to do instead.
1. Lay Molded Cups Flat
The safest option for most bras is to lay them flat on a clean, dry towel or drying rack.
Before leaving them to dry, gently reshape the cups with your hands. Make sure the fabric sits smoothly and that the cups are not folded, crushed, or turned inside out.
This matters particularly for molded-cup bras. Once foam develops a permanent crease or dent, simply washing the bra again will not necessarily make it return to its original shape.
Let the bra dry naturally at room temperature.
And do not place it directly against a radiator, heater, or other strong heat source just because you are impatient for it to dry. You are basically replacing one problem with another.
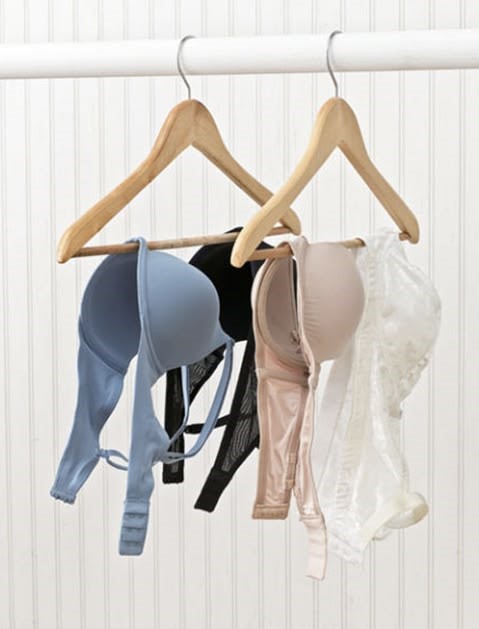
2. If You Hang It, Hang It From the Middle
Sometimes you simply do not have enough space to lay several bras flat.
If you need to hang them, there is one important rule: never hang a wet bra by its shoulder straps.
A wet bra becomes heavier because it is holding water. When you hang it from the straps, that weight pulls downward on the elastic and can gradually stretch the straps.
Instead, fold the bra over a drying rack or hanger through the center section between the cups.
That way, the weight is distributed more evenly instead of pulling on one small area.
3. Keep Them Out of Direct, Harsh Heat
Air-drying does not mean leaving your bras wherever you can find a patch of hot sunlight.
A well-ventilated area is ideal. You want air moving around the fabric so moisture can escape naturally.
If you live somewhere warm or humid, give the bra plenty of airflow and avoid leaving it bunched up against other wet clothes.
The goal is simple: gentle airflow, low heat, and plenty of room to dry.
How to Store Your Bras So They Keep Their Shape
Once your bras are completely dry, you still have one more opportunity to either protect them or slowly destroy them.
Your underwear drawer might seem harmless, but the way you store your bras can affect their cups, underwire, and overall shape.
This becomes especially important with molded or structured bras, because they need enough space to maintain their original shape.
1. Never Fold Molded Cups Into Each Other
This is one of the most common bra-storage habits, and one that can cause problems.
You know the trick: fold the bra in half and push one cup inside the other so everything takes up less space.
It looks neat.
It saves room.
But repeatedly turning one molded cup inside out can crease and distort the foam.
Those creases can eventually become visible underneath your clothes, especially underneath smooth tops and fitted dresses.
Instead, keep the cups facing their natural direction and avoid forcing them into shapes they were never designed to hold.
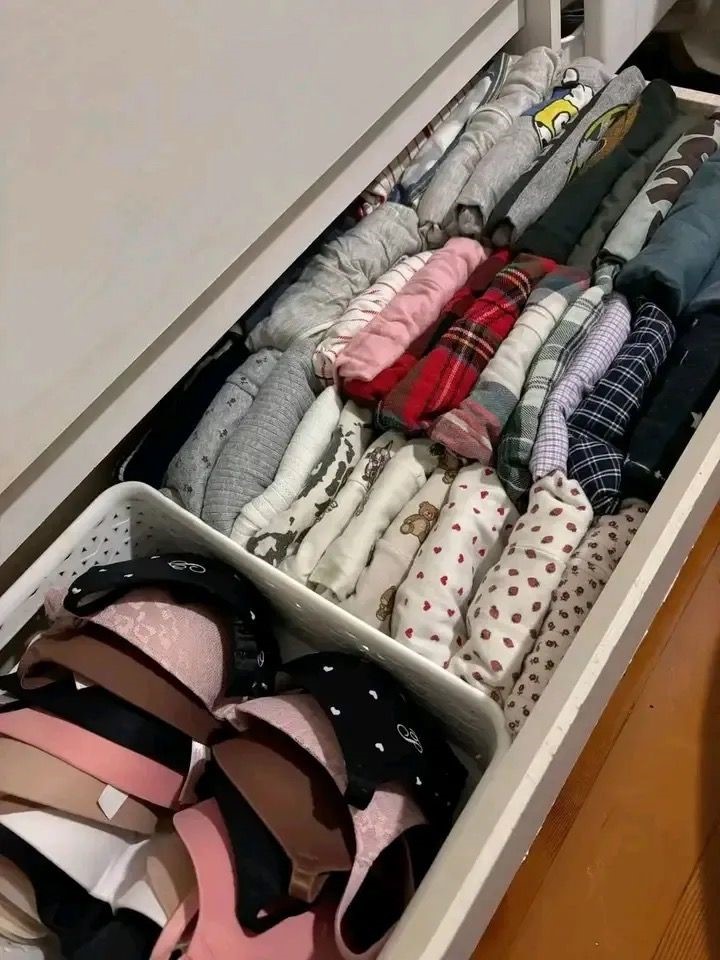
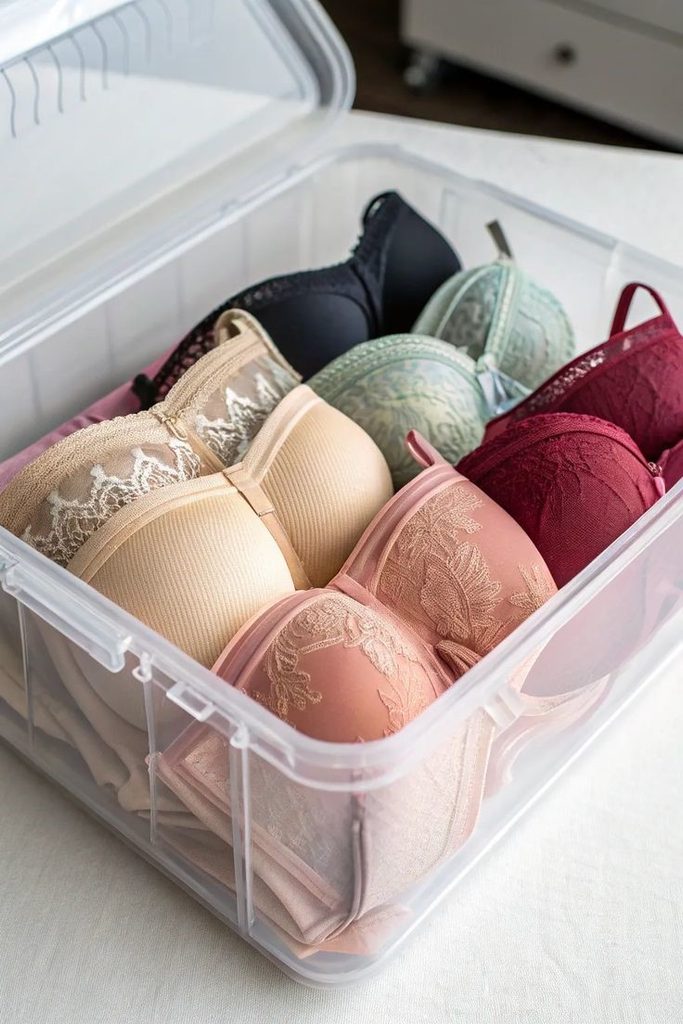
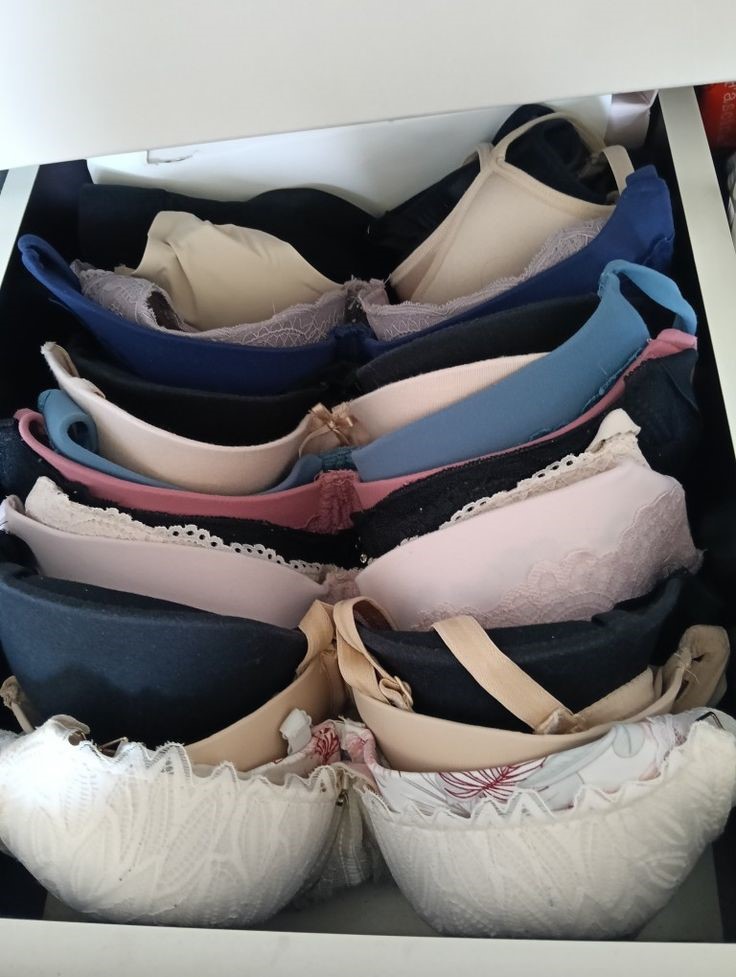
2. Stack Them Without Crushing the Cups
If you have several bras, place them one behind another in your drawer rather than folding them into tiny bundles.
For molded-cup bras, you can gently nest one cup into the corresponding cup behind it without turning either cup inside out.
Think of it like stacking spoons: everything stays in its natural shape while taking up relatively little space.
This also makes it much easier to see what you actually own instead of digging through a tangled pile every morning.
And if you are building a practical wardrobe around The Ultimate Plus Size Capsule Wardrobe, organizing your bras as carefully as your clothes can make getting dressed much easier.
3. Give Your Bras Their Own Space
Bras should not have to compete with heavy jeans, sweaters, shoes, handbags, and random accessories inside one overcrowded drawer.
Heavy items sitting on top of molded cups can flatten or distort them.
If your drawer is already packed, consider giving your bras a dedicated section or drawer organizer. You do not need anything fancy. The goal is simply to prevent them from getting crushed.
This is particularly helpful if you own several different styles for different outfits.
A smooth T-shirt bra, a plunge bra, a lace bra, and a full-support style do not all serve the same purpose. Keeping them organized helps you choose the right one instead of wearing the same favorite bra every single day.
Give Your Bras a Break Between Wears
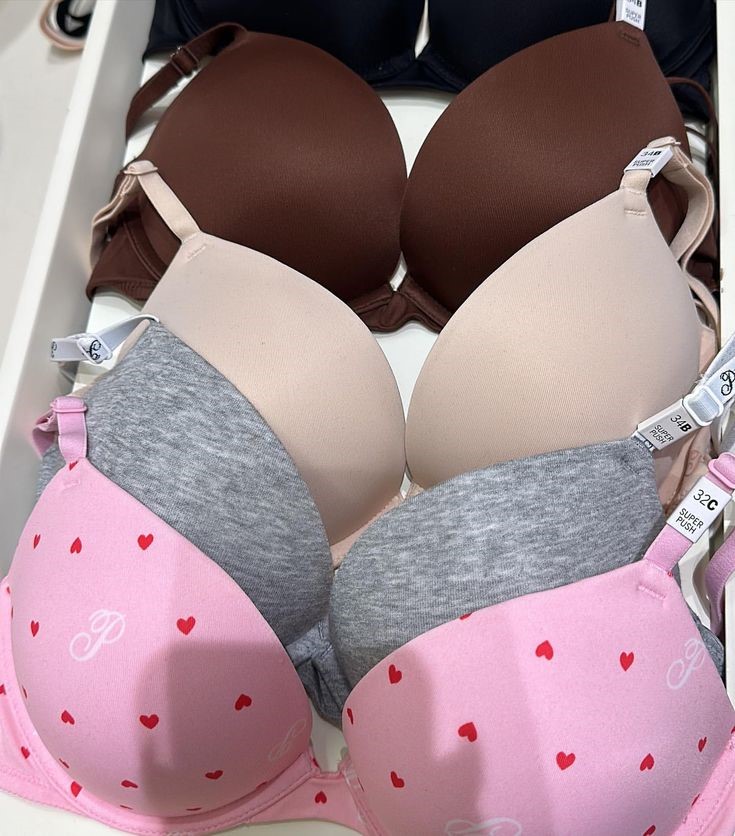
Here is another small habit that can make a surprisingly big difference: rotate your bras.
It is tempting to find one comfortable bra and wear it over and over again.
We all have that one.
The problem is that elastic needs time to recover after being stretched around your body all day. Wearing the same bra repeatedly without giving it a break puts constant stress on the same materials.
Ideally, have several everyday bras that you can rotate throughout the week.
This is also why building a comfortable collection matters. If you are working on How to Build a Comfortable Intimates Collection for your body size, think beyond simply owning more bras.
Aim for a small variety of styles that you can comfortably rotate depending on your outfit and activity.
Do Not Wear the Same Bra for Every Outfit
Your bra should work with your clothing, not fight against it.
A T-shirt bra may be perfect underneath a smooth fitted top, while a plunge style may work better with a lower neckline.
A supportive full-coverage bra may make more sense for a long day at work, while a softer bralette might be enough for a relaxed outfit.
Choosing the right style can reduce unnecessary stretching and tugging because you are not constantly trying to force one bra to work with every neckline and garment.
And if you have ever wondered why an outfit looks slightly different on your body than it did in your head, your bra could be part of the equation.
A poorly fitting or badly positioned bra can affect your proportions and the way fabric falls across your body. That connects closely with The Styling Mistake That’s Making Your Outfits Look Boxy.
Give Your Bras a Quick Check Before They Become a Problem
You do not have to wait until an underwire breaks through the fabric to realize your bra needs attention.
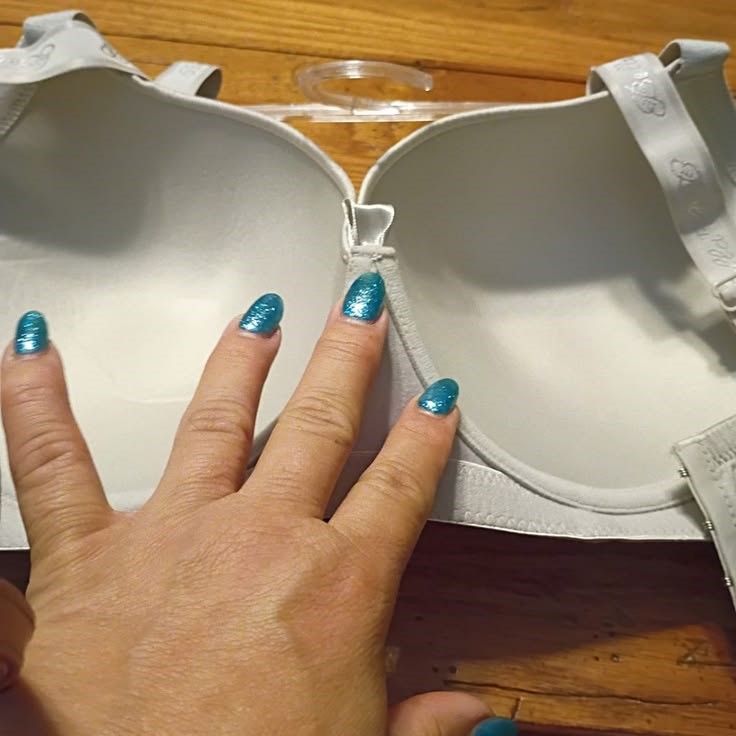
Every few weeks, take a quick look at your everyday bras.
Check the band.
Check the straps.
Look at the cups.
Inspect the underwire and seams.
Is the elastic still bouncing back after you stretch it?
Are the cups still smooth?
Is the underwire sitting where it should?
Are the hooks becoming difficult to fasten?
These small checks can help you catch wear before it turns into a painful wardrobe emergency.
If your bra no longer fits the way it used to, do not automatically assume your body has changed. The bra itself may simply have stretched out. And if you are unsure about your current fit, How to Find a Bra That Actually Fits is a useful place to start.
When Should You Finally Replace a Bra?
Even the best-cared-for bra eventually reaches the end of its life.
Proper washing and storage can extend its lifespan, but they cannot make elastic last forever.
It is probably time to replace a bra when:
- The band stays stretched even after you wash it.
- You have to use the tightest hook just to get a supportive fit.
- The straps keep slipping despite being adjusted correctly.
- The cups have permanent wrinkles, dents, or distortion.
- The underwire has become uncomfortable or has started poking through.
- The fabric has become thin, damaged, or badly stretched.
- The bra no longer gives you the support it once did.
One important point: do not keep wearing a bra simply because it technically still closes at the back.
A bra can look perfectly wearable while no longer providing the support you need.
If you are constantly adjusting the straps, pulling down the band, rearranging the cups, or feeling uncomfortable throughout the day, it may be time to let that bra go.
And if you keep experiencing the same problems with your bras, take a look at The Most Common Bra Fitting Mistakes Plus Size Women Make. Sometimes the issue is not how you care for the bra—it is that the bra was never giving you the right fit in the first place.
A Little Extra Care Can Save You Money
Bras are not cheap, especially when you finally find styles that fit comfortably and work with your wardrobe.
The good news is that caring for them properly does not require an expensive product or complicated routine.
Wash them gently.
Keep them away from heat.
Never wring them out.
Let them air-dry.
Store molded cups without crushing them.
Rotate your bras instead of wearing the same one every day.
And replace them when they genuinely stop doing their job.
These small habits may not seem impressive on laundry day, but they add up over time. Instead of constantly replacing stretched-out bands, misshapen cups, and broken underwires, you can get much more wear from the bras you already own.
And honestly, when you finally find a bra that fits beautifully, feels comfortable, and works underneath the clothes you love, it is worth taking care of.